In this lesson we take our final look at the basics of the CSS box model by looking at borders and the twenty CSS properties available to use with them. Don’t let the amount of CSS properties available for borders fool you into thinking they are complex though, because borders are very simple to understand and use. Borders have colour, style and width attributes that can be set using CSS. The twenty tags available for use with borders are used to set these values individually for each border side, or for all borders using some neat shorthand CSS properties.
Border Colour CSS Properties
border-top-color, border-right-color, border-bottom-color and border-left-color
Specifies the colour of the top, right, bottom and left borders respectively.
border-color
Shorthand for specifying the border colour for all four borders of a box.
Border Style CSS Properties
border-top-style, border-right-style, border-bottom-style and border-left-style
Specifies the style of the top, right, bottom and left borders respectively.
border-style
Shorthand for specifying the border style for all four borders of a box.
Border Width CSS Properties
border-top-width, border-right-width, border-bottom-width and border-left-width
Specifies the width of the top, right, bottom and left borders respectively.
border-width
Shorthand for specifying the border width for all four borders of a box.
Border Shorthand CSS Properties
border-top, border-right, border-bottom and border-left
Shorthand for specifying the border colour, border style and border width of the top, right, bottom and left borders respectively.
border
Shorthand for specifying the colour, style and width of all four borders of a box.
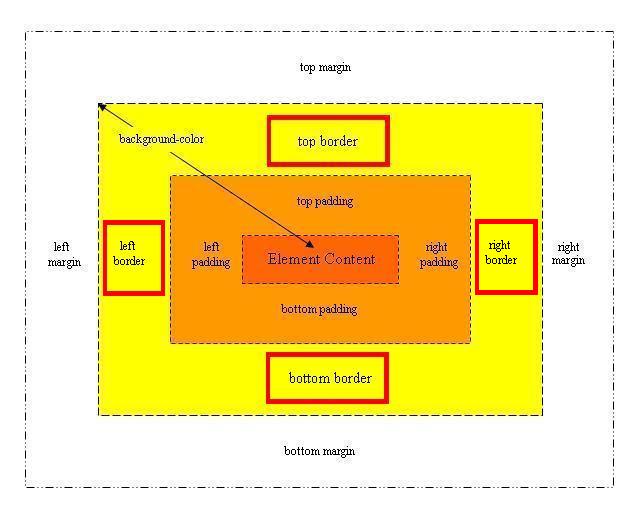
Border Positions In The Box Model

Viewing the CSS Properties
Wow! What a lot of properties to get our heads around. But wait its just colour, style and width with some neat shorthand to cut down on the CSS.
Lets take a look at the CSS border properties to see their effects on the box model.
Open up the file with Notepad we created and tested in Lesson 8: Padding & Margins.
You saved the file to your computer in the C:\_CSSBasics folder as lesson_8_csspage.html
Copy and paste the following code into the reopened file, overwriting the existing text.
<!DOCTYPE html PUBLIC "-//W3C//DTD XHTML 1.0 Strict//EN"
         "http://www.w3.org/TR/xhtml1/DTD/xhtml1-strict.dtd">
<!-- Our HTML/CSS for Borders follows -->
<html  xmlns="http://www.w3.org/1999/xhtml">
<head>
<title>HTML Doctor - CSS Tutorials - Basic CSS Lesson 9 - Borders</title>

<style type="text/css">

/* Set a padding around images to see the effects of
   changing the border colour, style and width */
img {
	padding: 10px;
}

/* Set all borders then change right hand border only */
#img1 {
	border: 4px solid black;
	border-right: groove blue 6px;
}

/* Set all borders then change widths as follows
   Top border set to 10px, left and right border set to 1px
	 and bottom border set 5px */
#img2 {
	border: 2px solid green;
	border-width: 10px 1px 5px;
}


/* Top and bottom border set to red, left and right border set to blue
   Top border set ridge, left/right border set dotted and bottom border set double */
#img3 {
	border-color: red blue;
	border-style: ridge dotted double;
}

/* border styles set individually overwriting certain borders
   border widths set individually  overwriting certain borders */
#img4 {
	border: 4px solid black;
	border-top-color: maroon;
	border-left-style: dashed;
	border-right-width: 7px;
}

</style>

</head>
<body>
<h1>Looking at the CSS border Properties</h1>
<p>Set all borders then change right hand border only.
<img id="img1" src="http://htmldoctor.info/images/beefalepiesmall.jpg"
    alt="Beef and Ale Pie" />
</p>
<p>3 properties set for border in width.
<img id="img2" src="http://htmldoctor.info/images/beefalepiesmall.jpg"
    alt="Beef and Ale Pie" />
</p>
<p>2 properties set for border colour and style.
<img id="img3" src="http://htmldoctor.info/images/beefalepiesmall.jpg"
    alt="Beef and Ale Pie" />
</p>
<p>Set individual properties.
<img id="img4" src="http://htmldoctor.info/images/beefalepiesmall.jpg"
    alt="Beef and Ale Pie" />
</p>
</body>
</html>
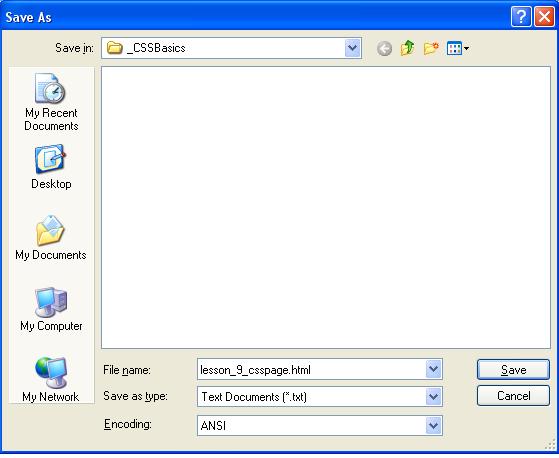
Save the file in the C:\_CSSBasics folder as lesson_9_csspage.html and close the Notepad.

Viewing Our Saved File
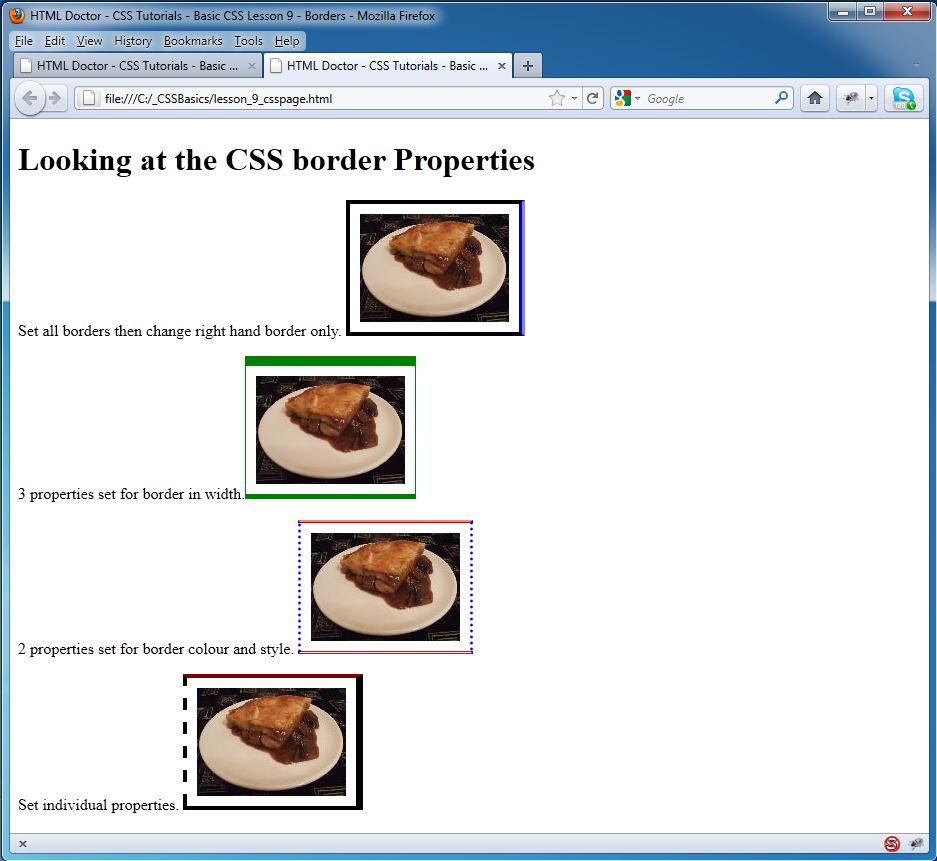
From the C:\_CSSBasics folder, double click on the saved file and it will appear in your default web browser and look something like the following image.

Reviewing Our Changes
There are a lot of CSS border properties available for us to use. Just remember that you can use a shorthand property and then overwrite specific sides of the border using a particular border and modifier. This really cuts down on the style code and makes the style more readable. For brevity, only some of the properties available were used in this practical. For an in-depth review of all the border properties see the individual properties in the reference section.
More to learn: Layout – Advanced CSS

