
In this lesson we explore backgrounds and how they bring our blank canvasses to life. We can use a colour for the background or an image that can be attached, positioned and repeated as required. We look at the CSS background properties that let us do this and increase our knowledge in this lessons practical.
Background Colour CSS Property
background-color
Specifies the background colour for an element.
Background Image CSS Properties
background-attachment
Specifies whether the background image is fixed or scrolls.
background-image
Specifies the background image for an element.
background-position
Specifies the position of a background image within an element.
background-repeat
Specifies if and how a background image is repeated.
background
Shorthand CSS property for specifying the other background image properties.
The Basic Tools
All we need to get going is a basic text editor such as Notepad for windows. So for instance using Windows XP:
click Start>>All Programs>>Accessories>>Notepad
Creating A Folder For Our CSS Intermediate Files
Let’s create a folder for our CSS intermediate lessons
double click My Computer icon
double click C:\ drive (or whatever your local drive is)
right click the mouse in the window
from the drop down menu Select New
click the Folder option and call the folder _CSSIntermediate and press enter.
Viewing the Background CSS Properties
Let’s take a look at the background properties available to us in our first CSS intermediate practical.
Ok, with Notepad or a similar text editor open, copy and paste the following code into the editor.
<!DOCTYPE html PUBLIC "-//W3C//DTD XHTML 1.0 Strict//EN"
         "http://www.w3.org/TR/xhtml1/DTD/xhtml1-strict.dtd">
<!-- Our HTML/CSS for the Backgrounds tutorial follows -->
<html  xmlns="http://www.w3.org/1999/xhtml">
<head>
<title>HTML Doctor Intermediate CSS - Lesson 1 - Backgrounds</title>

<style type="text/css">

/* Set a border and padding and margins around images to
   see the effects of background colours */
img {
  padding: 20px;
  margin: 5px;
  border: 1px solid black;
}

/* Background attachment fixed */
#para1 {
  background: url(http://htmldoctor.info/images/html.png) fixed 50% 20% no-repeat;
}

/* Background repeat horizontally*/
#para2 {
  background: url(http://htmldoctor.info/images/html.png) repeat-y;
}

/* Set a background colour */
#img1 {
  background-color: aqua;
}
#img2 {
  background-color: transparent;
}

/* Set a background colour and image */
#img3 {
  background-color: aqua;
  background-image: url(http://htmldoctor.info/images/chickenpiesmall.jpg);
}
#img4 {
  background-color: red;
  background-image: url(http://htmldoctor.info/images/noimage.jpg);
}

/* Background positioning with keywords */
#img5 {
  background-image: url(http://htmldoctor.info/images/tomato2.png);
  background-position: top left;
  background-repeat: no-repeat;
}
/* Background positioning with percentages */
#img6 {
  background-image: url(http://htmldoctor.info/images/tomato2.png);
  background-position: 30% 80%;
  background-repeat: no-repeat;
}
/* Background positioning with lengths */
#img7 {
  background-image: url(http://htmldoctor.info/images/tomato2.png);
  background-position: 15px 15px;
  background-repeat: no-repeat;
}

</style>

</head>
<body>
<h1>Looking at the CSS Background Properties</h1>
<h2>Background Attachment Fixed.</h2>
<p id="para1">Background image is fixed.
Filler text.Filler text.Filler text.Filler text.Filler text.Filler text.Filler text.
Filler text.Filler text.Filler text.Filler text.Filler text.Filler text.Filler text.
Filler text.Filler text.Filler text.Filler text.Filler text.Filler text.Filler text.
Filler text.Filler text.Filler text.Filler text.Filler text.Filler text.Filler text.
Filler text.Filler text.Filler text.Filler text.Filler text.Filler text.Filler text.
Filler text.Filler text.Filler text.Filler text.Filler text.Filler text.Filler text.
Filler text.Filler text.Filler text.Filler text.Filler text.Filler text.Filler text.</p>
<h2>Background Image Repeat Vertically.</h2>
<p id="para2">Background repeat vertically.
Filler text.Filler text.Filler text.Filler text.Filler text.Filler text.Filler text.
Filler text.Filler text.Filler text.Filler text.Filler text.Filler text.Filler text.
Filler text.Filler text.Filler text.Filler text.Filler text.Filler text.Filler text.
Filler text.Filler text.Filler text.Filler text.Filler text.Filler text.Filler text.
Filler text.Filler text.Filler text.Filler text.Filler text.Filler text.Filler text.
Filler text.Filler text.Filler text.Filler text.Filler text.Filler text.Filler text.
Filler text.Filler text.Filler text.Filler text.Filler text.Filler text.Filler text.</p>
<h2>Background Colours and Images</h2>
<p>
<img id="img1" src="http://htmldoctor.info/images/logo.png"
    alt="Logo" width="75" height="50" />
<img id="img2" src="http://htmldoctor.info/images/logo.png"
    alt="Logo" width="75" height="50" />
<img id="img3" src="http://htmldoctor.info/images/logo.png"
    alt="Logo" width="75" height="50" />
<img id="img4" src="http://htmldoctor.info/images/logo.png"
    alt="Logo" width="75" height="50" />
</p>
<h2>Background Positioning</h2>
<p>
<img id="img5" src="http://htmldoctor.info/images/shepherdspiesmall.jpg"
    alt="Shepherds Pie" />
<img id="img6" src="http://htmldoctor.info/images/shepherdspiesmall.jpg"
    alt="Shepherds Pie" />
<img id="img7" src="http://htmldoctor.info/images/shepherdspiesmall.jpg"
    alt="Shepherds Pie" />
</p>
</body>
</html>
Click file from the toolbar and then click the save option.
In the Save in: tab at the top make sure you are pointing to the _CSSIntermediate folder we created above.
In the File name: text area type lesson_1_csspage.html and then click the Save button and close the Notepad.
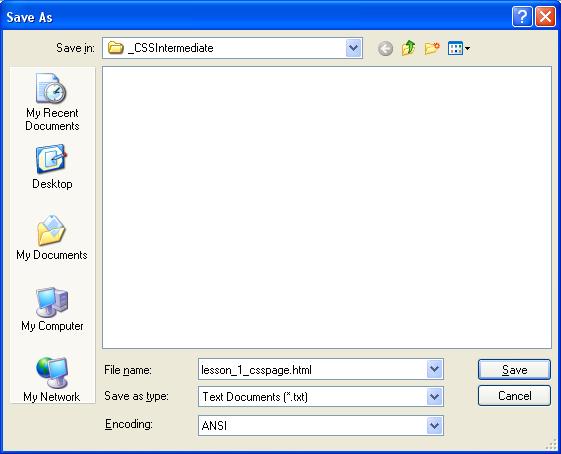
The .html file extension lets the system know that this is a hypertext document, you must save the file with this extension to view the document in your default web browser. If you do not save the file with the .html file extension Notepad and other text editors save the file with the .txt file extension. This will stop you viewing the file in a web browser.
Viewing Our Saved File
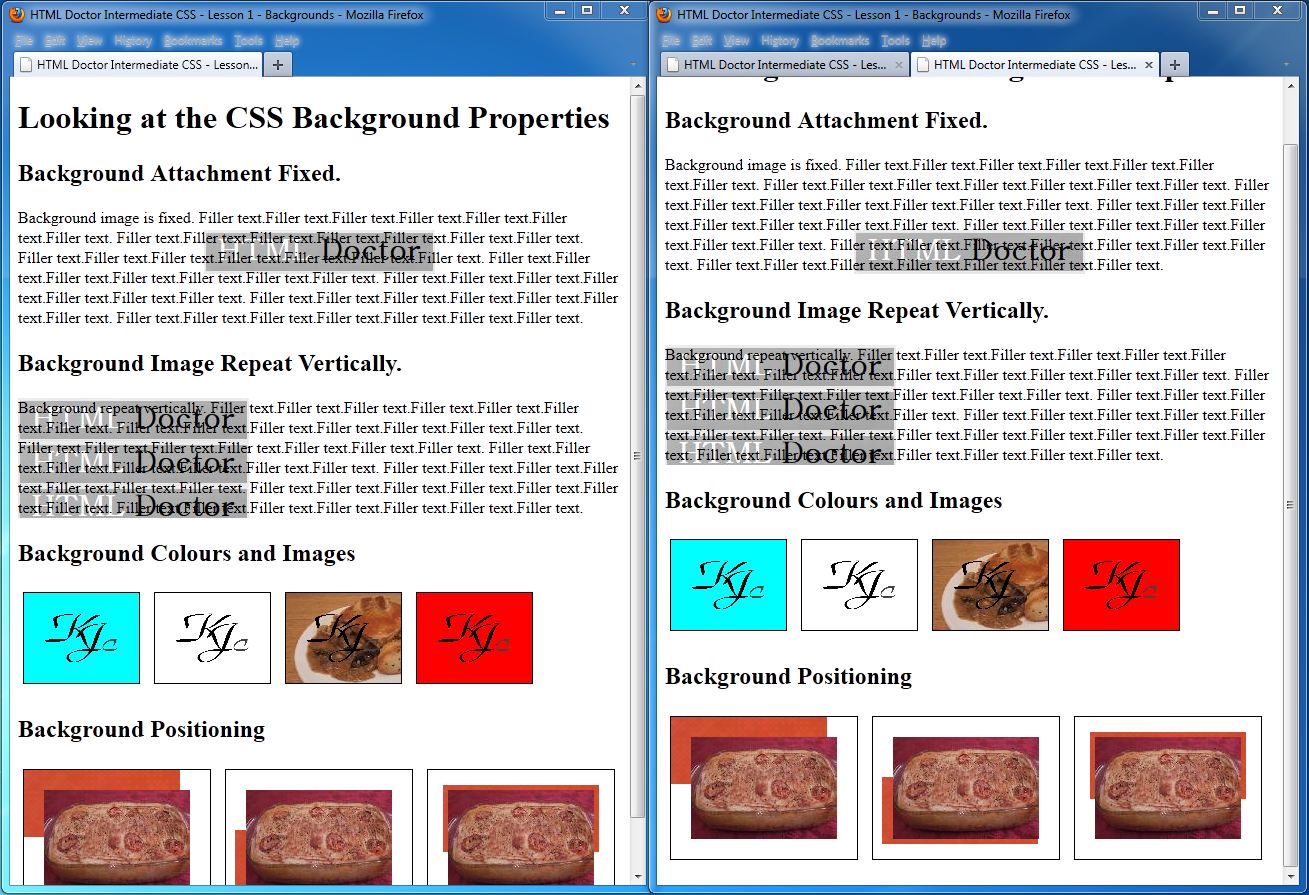
From the C:\_CSSIntermediate folder, double click on the saved file and it will appear in your default web browser and look something like the following image.
We are using two screens to show how the first image remains fixed in place.
Reviewing Our Code
In the first section we have set some filler text and have fixed a background image in position. If you look at the screenshots above you can see that when we scroll the image remains fixed in place. We have used percentages here which can be difficult to use: if you can get away with using keywords or precise measurements values to position your images, use them instead. The percentage is proportional to the styled element we are using, a paragraph in this case. If you rezise the window although the image is fixed it will still move in proportion to its containing element, the browser window.
In the next paragraph we are using an image and repeating it along a vertical axis.
The first set of four images we are using a background colour on the first two images and a background colour and background image on the next two. A point of interest here is that the last images background image isn’t found so the background colour is visible. It’s often good practice to specify a background colour as a ‘fallback’ for when an image isn’t available.
In the final three images we are using background positioning with precise measurement values to put a background image in place.
More to learn: Borders – CSS Basics